Manual information
APP: Tuya Smart, Smart Life
PRODUCTS & PACKING LIST
Product Diagram:


Battery partner

Packing list

Solar panel

Battery partner

PTZ Camera

User manual

Screw pack
INSTALLATION METHOD
- Intergrated installation
- Split Installation
- Extend Installation

Accessories needed (not standard configuration)

Type:1 Type:2

Bracket

Extend power cable 5M
ATTENTION : Fully charge the battery when using the camera for the first time.
APP REGISTRATION
Search and download “Tuya” in major applicatio markets or scan the QR code below to download the APP.

ACCOUNT REGISTRATION AND LOGIN
1. Once you download the APP to your smart phone, you may enter the first page which you can Login with existing account or register.
- If you are the new user of Smart Life and don’t have an account, please choose register first and follow the below screenshots to complete the registration.

2. If you have the existing account, there are two ways to login, one is with SMS verification Code, the other one is with password.
In case you forget the password, you may choose login SMS verification Code or you can choose forgot password to reset it by Entering Verification Code which sent to you mobile via message.

CONNECTING THE CAMERA TO YOUR MOBILE DEVICE
1. Connect the mobile device to your 2.4GHz Wi-Fi, then log in to Tuya.click ‘Add Device’on the Home of the App, select “Security & Video Surveillance”, “Smart Camera”, click “Next”.

2. Make sure the indicator is flashing quickly or a prompt tone is heard click “Next”. Enter Wi -Fi account and password, click “Next”. Hold the mobile phone screen in the front of the camera, the distance between the two should be 15 to 20 cm,Try not to shake the mobile phone during the scanning.

3. When you hear ‘Connect Router’, click “I Heard a Prompt”, and wait for connecting,Device added successfully, you can choose the device name and room scene.

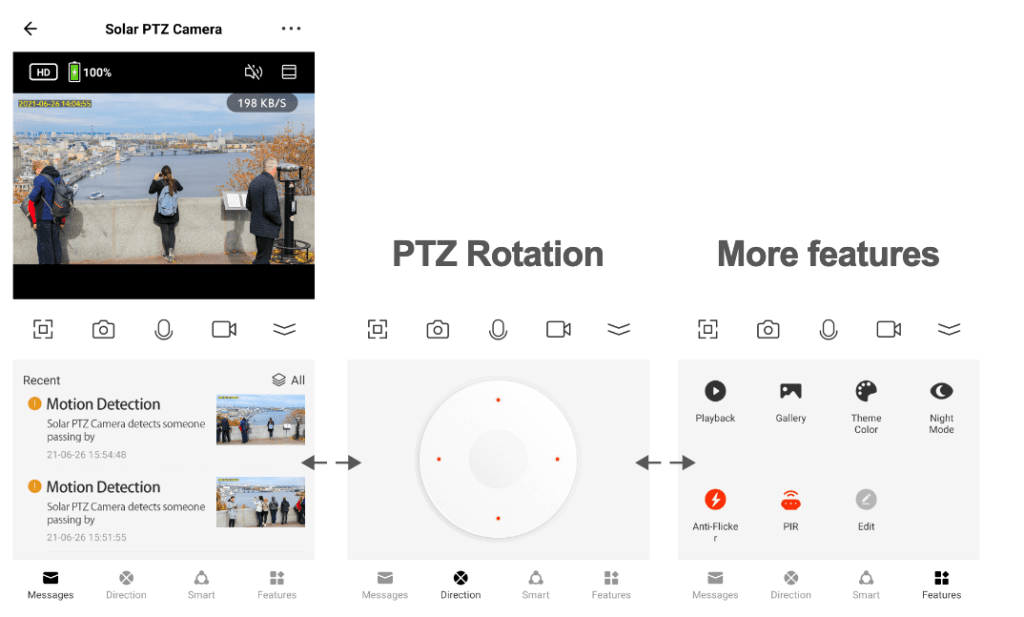
FUNCTIONS INTRODUCTION

Notes about PIR detection
*User can change the PIR detection sensitivity in device setings. we recommend to set sensitivity at “Disabled” or “Low” to reduce flase alret and save the battery power in noisy environments.
*Shut down: shut down PIR detection.
*Low: deleay 7 seconds PIR detects a moving.
*Medium: deleay 5 seconds PIR detects a moving.
*High: deleay 1 second PIR detects a moving.

SAFE BATTERY HANDLING AND USAGE
During the installation of the battery, the positive and negative poles of the battery should not be reversed to avoid fire.
